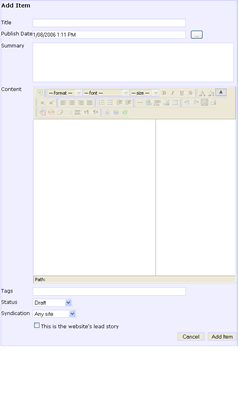
To add your first entry, follow these steps:
- Make sure you are logged in
- In your centre pane, you should see an 'add item' link somewhere - with an empty blog it will be somewhere near the top of the screen, a blog with entries already will have it down the bottom. Click on the link and you will see this edit box appear on your webpage...

- Type a title for your blog entry into the title field
- Click in the white space on the left hand side pane of the content box - this will activate the editing tool bar which allows you to do normal editing stuff like changing colours, text sizes, formatting etc etc.
- Type in your first blog entry - if you are feeling a bit squished with only a small amount of space to type - click on the expand screen icon
 - this will allow the edit box take over most of the page. Remember you will need to click on it again once you have finished adding your text.
- If you are happy with what you have typed, change the status to 'approved' from draft. If you don't want to publish your entry yet, leave it as draft and you can edit it again later using the My Articles link on your blog
- Click "Add Item"
- Voila! - of course now you have done that you probably want to add some images to your entries!!